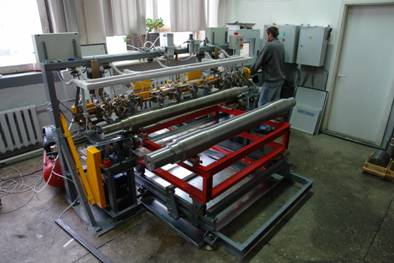
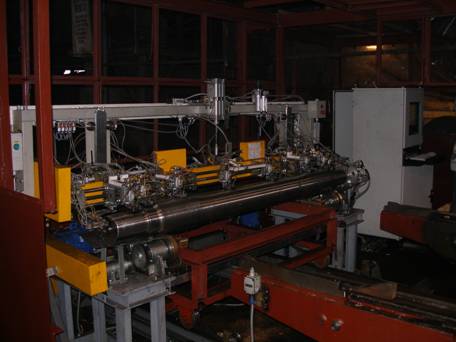
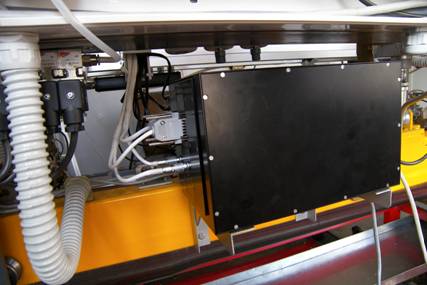
SNK OS-3 system performs 100% ultrasonic and eddy current testing of rail axles, then analyses testing results and makes a decision about axle rejection. The testing process is completely automated, including axle loading-unloading from the testing site.
One of the system main advantages is the application of two testing techniques: ultrasonic (UT) – intended for testing the rail axles metal structure and detecting internal defects; eddy current (ET) – intended for testing the radial surfaces and hollow (radius) chamfers of the rail axle for surface defects (cracks, fine cracks) with the opening from 10 µm and minimal depth 0.5 mm.
Main specifications:
- testing time, no more than – 6 minutes;
- in-line testing results output;
- storage of complete testing results in electronic format, possibility of subsequent viewing and analysis, statistical reports creation.
The system applies all obligatory and additional techniques of acceptance ultrasonic testing, according to RD, to every testing axle. As a result, the metal structure testing and testing for internal defects absence of both longitudinal and transverse directions are provided.
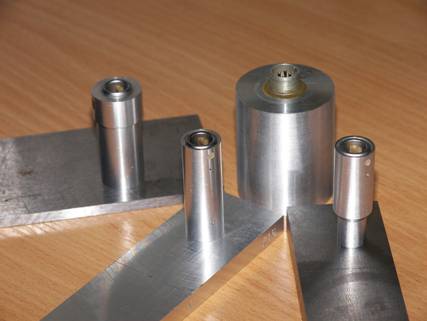
Metal structure is estimated by comparing echo-signal amplitude from the opposite axle end during ensounding from every end surface by longitudinal waves in axial direction with echo-signal amplitude in the standard sample (Т1 technique), and also by echo images technique from the cylindrical surface in radial direction – by estimating the bottom signal attenuation (Т2 technique).
Testing for internal defects absence is carried out with the help of echo pulse techniques:
- А1 – from every end surface by longitudinal waves in axial direction;
- А2 – from radial surfaces by longitudinal waves in radial direction;
- А3 – from radial surfaces by transverse waves in axial direction.
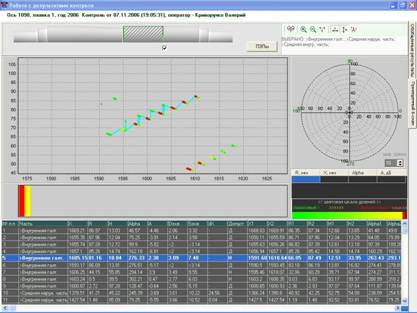
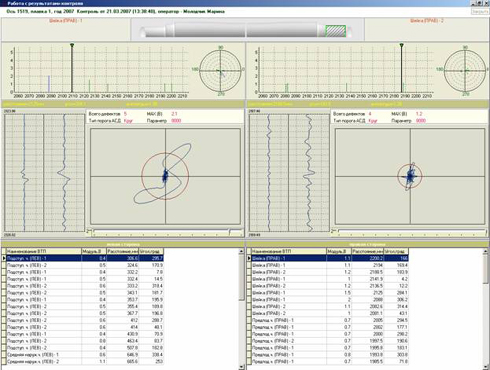
The system performs 100% ultrasonic testing, then analyses testing results and makes a decision about axle rejection, and also generates a complete testing report in electronic format. Short report can be printed as well. All ultrasonic testing results in the form of B-scans via all channels for every inspected axle are stored on a hard disk, but it is also possible to archive them on CDs.
Testing process is totally automated. An operator should only press "TESTING" button, and the system itself will be incorporated in the customer's manufacturing line. Testing sensitivity is set up by DGS diagrams. It is possible to plot new DGS curves and correct them for account taken of the probe wear influence. One axle testing time is less than 6 minutes. As a result, the throughput capacity of up to 10 axles per hour is reached. Light and sound alarm goes off when inadmissible defects are detected.
The axle is loaded on the testing site from the entry chute with the help of a robot-transfer. On the testing site a rail with scanners is lowered to the axle, the encoder is input.
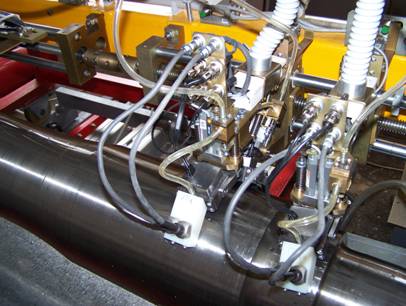
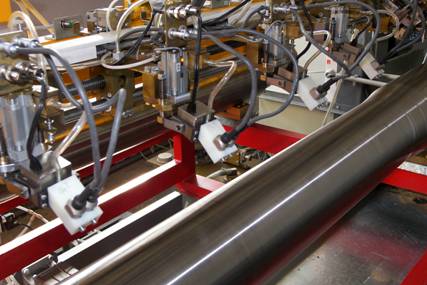
The probes are input in the testing object, the couplant (industrial oil) is supplied, the axle starts rotating and the probes begin moving along the testing object. After the axle has done one full turn, the couplant is supplied, and frames with probes start shifting along the axle. At this, probes makes spiral trajectory with 7 mm scanning pitch along the axle surface what makes it possible to perform uniform ensounding of the whole testing object. When the probe reaches an end of its testing area, its frame input is switched off and after one full turn the probe is taken away from the axle. At the same time, other probes continue testing.
During scanning process data are continuously acquired via all channels – from every transducer. All data are accumulated in the control computer and are stored in its memory.
After all probes have scanned their testing areas, they are returned in the initial position. The rail with scanners is taken aside and the axle itself is removed from the testing site to the unloading chute by a robot-transfer.
Meanwhile, control computer processes data outputs a short testing report and stores complete results in the database. All stored data can be viewed on the documentation computer in any moment. Here it is possible to get in-depth information about every detected defect:
- defect spatial orientation;
- defect coordinates;
- echo-signal amplitude from the defect;
- defect length;
- equivalent area and diameter of the detected defect.
The system allows to create databases of the inspected items. It is also possible to archive data on CDs or other carriers at the customer's will.
Special construction of probes carriers makes it possible to create reliable, and above all stable acoustic coupling between the probe and testing object what, in its turn, allows to neglect the surface defects (such as scratches, chips, compression marks), protects the probe working surface from wear, provides stable couplant supply. All this assures high reliability of testing results.
Every axle structural part is tested by "its" probe what makes it possible to decrease considerably one axle testing time, and every probe construction assures complete and uniform testing of the whole testing area. At the same time, to decrease the testing duration in whole, the axle midsection is tested by four probes. Thus, 100% testing is performed for a shorter period of time.
It is worth mentioning that two SAUZK-axles systems are designed by the specialists of our company, have already been manufactured and successfully used by the customers. But we keep moving on and constantly improving and introducing "know-how" into developing testing systems.
Thus, according to the normative document RD32.144-2000 the magnetic particle technique is obligatory for finishing axles of railcars wheel pairs. However, this testing type has a number of important drawbacks:
- poor efficiency;
- great cost;
- human factor influence on testing results;
- much manhours.
All this did not allow or substantially complicated automation of the axle surface testing. As it is obvious, to maintain large throughput, it is necessary to increase the product testing efficiency.
Taking into account the above mentioned, our specialists performed modernization of systems such as SAUZK-axles. Performed researches and experiments resulted in determination of possibility to substitute magnetic particle inspection with eddy current testing.
The absence of probes with parameters sufficient to reach the necessary sensitivity was an essential problem for eddy current testing introduction. However, this issue was solved by designing and manufacturing probes of new generation such as MDF (multidifferential). Characteristics of these ECP permitted to reach the sensitivity level that corresponds to the magnetic particle testing, and made it possible to detect defects of B-category in compliance with RD32.144-2000. Eddy current technique application by using probes such as MDF offers a number of advantages:
- good suppression of primary electromagnetic field;
- high resolution at wide testing area;
- possibility of defects parameters determination.
This innovation allowed increasing the testing efficiency, decreasing the cost and improving the testing reliability.
SANK-3 system is equipped with ECP unit for the axle cylindrical surfaces testing, and also with the ECP units for hollow chamfers testing. By agreement with the customer, the possibility of the axle end surfaces testing is provided. Thus, eddy current testing assures 100% testing of the axle surface for the purpose of the surface and near-surface cracks detection.
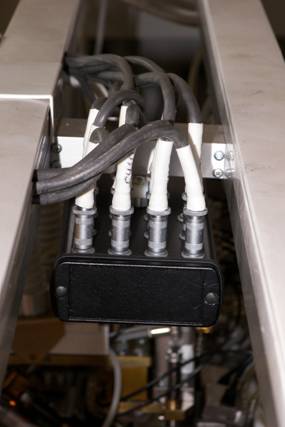
Eddy current probes are situated directly on the testing sites, are connected with the switching devices each of which is able to provide switching of up to 32 channels.
Signals from the switching devices enter the electronic units by special cables, there they are preprocessed and accumulated.
On testing completion, these data are transmitted to the central computer which performs reprocessing and stores defect sections in the database. With the help of special software an operator can deeply analyze the testing results.
Testing system software allows to setup every channel (probe) in a romp:
- selection of ECP operating frequency;
- setup of ECP operation voltage amplitude;
- sensitivity setup;
- threshold level setup;
- selection of signal filtering mode.
All settings are stored in the database.
Except for the eddy current testing technique introduction, both ultrasonic testing structures and the whole system mechanism have been modernized and updated in a new "SANK-3" system. Taking into consideration the customer's requirements and wishes, the following is performed in a new system:
- possibility of testing carrying out of both cylindrical and conical axles;
- testing time decrease due to the axle midsection testing with the help of four ultrasonic probes;
- pursuant to the customer's requirements, there is a possibility to change the testing scheme by using additional probes and testing schemes;
- couplant supply system construction update made it possible to reduce considerably the industrial oil consumption;
- innovations introduction in the system software simplified substantially the system control and setup.
Thus, a new "SANK-3" system completely meets the requirements of the railcars wheel pairs axles testing in compliance with RD-32.144-2000. It provides 100% efficient axle testing and complete documentation of its results. It enables not only to detect defects, but to provide the manufactured axles with the quality certificate as well. Introduction of such system on your enterprise will allow the customer to be sure in the quality of manufactured products.

