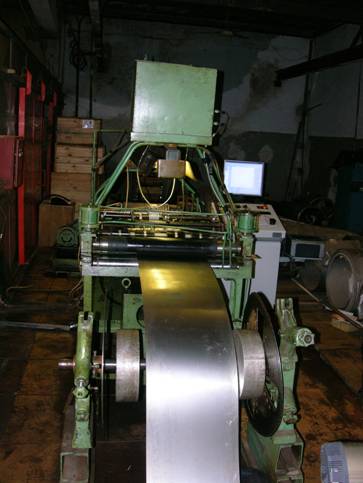
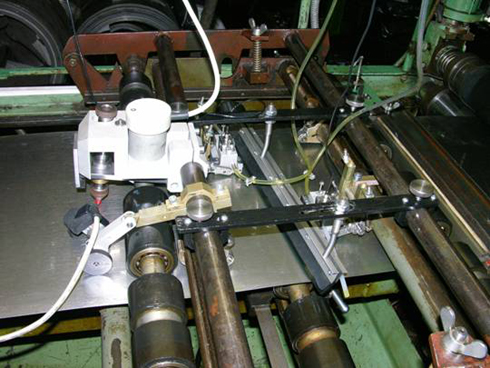
This developed system provides the following capabilities:
- mechanized thin steel strap testing by ultrasonic technique for internal and surface defects such as delaminations, pinches, inclusions etc.;
- mechanized thin steel strap testing by ultrasonic technique with the usage of the pair of special ultrasonic angle beam contact probes that excite Lamb waves in the testing object;
- stable detection of defects, which are equivalent to the testing reflector by their reflection power, such as 1 mm diameter through-hole drilling.
Strap parameters where the defects presence is tested:
- material: stainless steel grade 12Х18Н10Т and similar ones;
- thickness: (from 0,15 to 0,60) mm and 1 mm;
- width: from 300 to 410 mm.
Main specifications of the system:
- admissible untesting areas ("dead areas") up to 12 mm from the strap end for the thicknesses up to 0.6 mm and 25 mm for the thicknesses more than 0.6 mm;
- number of testing ultrasonic channels, no less than 2 (possible to connect up to 8 channels);
- strap linear speed, no more than 6 m/min;
- rated ultrasonic waves values – 1,25 MHz and 2,5 MHz.
System provides the following service functions:
- information display in the form of A-scan and B-scan;
- acoustic coupling quality testing;
- recording, storing of results and testing process information display (in the form of defectogram);
- printing and storing of testing results (testing report) on electronic data carrier;
- sound and light signal occurrence on defects presence;
- marking the strap parts defining the defects location with paint;
System functions in three operating modes:
- "Calibration" mode – intended for mechanical parts setting and rejection levels setting. In this mode an operator controls manually the movement of the probes units and the strap and sets the testing rejection level. Calibration quality is checked during manual switching-on of a transport actuator.
- "Automatic testing" mode – main operating mode. If the defect is detected, the strap stops moving. An operator marks the defect by moving manually the frame with UT probes and watching А-scan at this. Afterwards, the frame returns in its initial position.
- "Testing" mode – automatic testing with manual defects confirmation. Testing is performed with an operator's limited participation. In this mode when the alarm goes off indicating the excess of the signal level that has been set during the rejection level calibration, the strap transport actuator automatically stops moving and an operator, manually moving the probes units, watches the signal (in the form of A-scan) from the defect on the flaw detector screen and performs sorting (detected defect confirmation or rejection), afterwards automatic testing continues.

