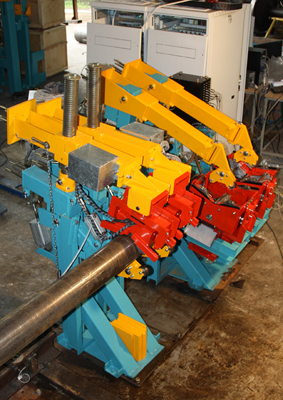
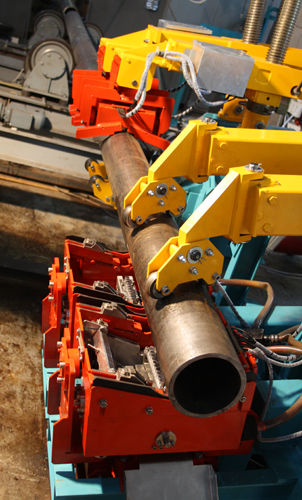
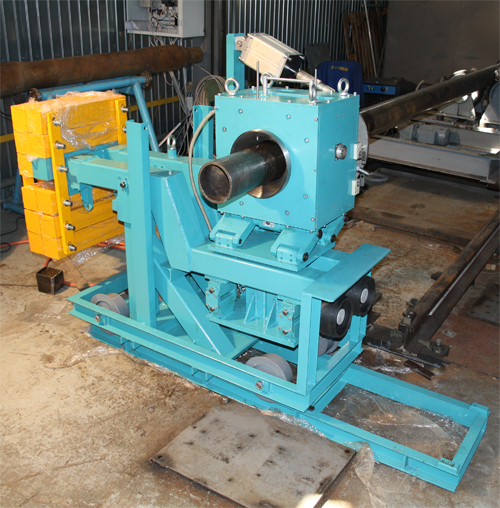
SNK UNISCAN-LuCH T-18 Purpose
The System of automated non-destructive testing of pipe`s body SNK UNISCAN – LuCH T-18 is intended for complex automated non-destructive testing of pipes along hot-rolled surface using ultrasonic and eddy current methods. The System is built into the Customer`s processing line and carries out non-destructive testing during pipes drive linear motion along the flaw detection roller bed with the diameter from ø 140 mm to ø 377 mm.
Ultrasonic part of the System consists of 4 immersion tanks. Specified number of immersion tanks and ultrasonic probes provides a complete testing of the pipe`s body for the presence of defects such as discontinuities and metal inhomogenuity, defects such as metal delimitation and pipe`s wall thickness measurement by ultrasonic method.
Two immersion tanks No.1 and No. 2 are designed for a complete immersion ultrasonic testing of pipe`s body for the presence of eliminations and for carrying out of thickness gauging. Also, testing schemes are implemented in a tank No.1 allowing to carry out a 100% testing of pipe`s body for longitudinally-oriented defects such as cracks. Tanks No. 3 and No.4 are designed for carrying out of ultrasonic testing of the pipe`s body for transverse defects detection.
Eddy current part of the System consists of 2 scanners with surface ECPs and of an encircling ECP unit. It provides defects detection of longitudinal and transverse orientation relative to the pipe axis.
Scanner with surface ECPs:
- Consists of 18 surface ECPs;
- Allows to carry out testing of pipes with the diameter from ø 140 mm to ø 377 mm;
- ECPs are set in hardwearing protective housings;
- Each ECP has a mechanic independent suspension which provides a constant lift-off between the ECP and pipe`s body.
Encircling ECP unit:
- Consists of magnetizer and encircling ECP with centering hubs;
- Is set with probes allowing to carry out pipes testing with clearly specified range of diameters;
- Equipped with mechanical positioning assembly for ECP centering relative to the testing pipe.
The System provides defects detection in accordance with the requirements of the following standards: GOST 632-80, GOST 633-80, GOST 8731, GOST 8732, API Spec 5L, API Spec 5CT, EN 10210, EN 10216, EN 10246-3, EN 10246-7, tolerance class U2, EN 10246-14, tolerance class U2, DIN 1629, DIN 1630, DIN 17175, ISO, TU 14-3-460.
Pipes with a surface obtained after the hot rolling are subjected to testing. Pipe`s geometry differs from the regular circle. The ends of defined pipes are previously cut off. Pipes technical specifications are shown in table 1.
Table 1. Main technical specifications of pipes.
| Parameter | Value |
| Pipes materials are steel grades with strength of, [N/mm2.] | 390 ÷ 1400 |
| Testing pipes outer diameter, D [mm.] | 140 ÷ 377 |
| Wall thickness, t [mm.] | 5 ÷ 30 |
| Pipes length L [mm.] | 8000 ÷ 13000 |
| Curvature of any pipe section at 1 m in length can be of, mm | 2,5 |
| Maximum bending at 1,5 m in length at each end, [mm] | 3,2 |
| Allowable change of pipes outer diameter from the rated value, [%.] | ±1 |
| Pipes temperature in the testing area [С 0.] | +10 ÷ +400 |
| Ultrasound velocity in the pipe`s body [m/s.] | 4000 ÷ 8000 |
Ultrasonic part of the System provides defects detection with the reflecting power equal to or greater than the reflecting power of reference reflectors:
- Longitudinal and transverse grooves located at outer and inner pipes surface:
- Groove`s length is not more than 50 mm;
- Groove`s width does not exceed two depths, but is not more than 1 mm;
- Groove`s depth of 3%-15% from the wall`s thickness t, but is not more than 0,3 mm (0,3-3,5 mm).
- Delaminations simulated by the flat bottomed reflector:
- flat bottomed reflector diameter is of 6,4 mm;
- Drilling depth of 25-90 % from the rated value of the pipe wall thickness, but is not less than 2 mm.
The System eddy current section provides defects detection equal to artificial defects in the form of through center drilling and standard grove according to the acceptance levels.
| Acceptance level (testing) | Slits depth max.% | Slits length max. to all depth mm | Width max.,inch | Diameter of radial drilled hole, inch |
| 1 | 2 | 3 | 4 | 5 |
| L2 | 5 | 50 | 1 | 1,6 |
| L3 | 10 | 50 | 1 | 3,2 |
| L4 | 12,5 | 50 | 1 | 3,2 |
Main technical specifications:
- This System carries out testing of pipes with standard sizes meeting the following condition:
 , where
D – pipe`s outer diameter [mm];
t – pipe`s wall thickness [mm]. - Carrying out of complex UT and ET of a pipe body;
- Length of uncontrolled pipes` ends does not exceed of 300 mm;
- Testing performance is not less than 30 pipes per hour with a length of L=12000 (mm) with an outer diameter of D=245 (mm);
- Marking the fact of testing performance and a separate marking of coordinates of defected areas;
- Sound and light Alarm ( automatic defects Alarm);
- Data transfer via Ethernet into general shop data interchange system;
- Integrated system of video monitoring for remote control by the testing process.
System structure allows to:
- Carry out an individual testing of acoustic coupling of each PEP;
- Real-time presentation of UT results in a form of defectogram for all UT channels, A-scans for one UT channel;
- Real-time presentation of ET results in a form of strip charts for all eddy current channels and also in a form of complex plane for independently selected channel.
The System of automated non-destructive testing of a pipe`s body SNK UNISCAN-LuCH T-18 and T-18 VT provides 100% documentation of testing results in particular:
- record, storage of results and on-line display of the testing process data in a form of defectogram - this information allows effectively estimate testing results directly during the performance of the testing process;
- output of testing results on electronic media and in a hard copy;
- using a special-purpose Software there is a possibility of remote operation with archives of stored data, formation of various forms of reports and protocols by obtained results.
Watch video:


